JSON restores progress · CSV is for spreadsheets. JSON import: max 1,000,000 bytes.
Chapter 2Not started
Start the first generator
01
Before you start
Finish Stella’s opening digsite call.
02What to doA nudge in the right direction
Head left from the hub and cross the crates. Trigger the first timed door, follow the generator cable to the next button, and cross its timed platform route. Start the generator; use the return-route button to reach the hub.
03What should happenReveal the solution
The first side generator is running.
Still stuck?
First check whether you have actually started the generator beyond the left-hand timed-door route. If a door closed while you were crossing, return to its own button and line up the route before reopening it; reaching the hub again does not confirm that the generator was started.
The first generator is running and you are back at the hub.
02What to doA nudge in the right direction
Follow the cable ahead and to the right through the crawlspace. Use the lift, cross the right-hand platforms and pillars, and start the second generator. Crawl through the same opening to return.
03What should happenReveal the solution
Both tower power routes are restored.
Still stuck?
If the first generator is running but the tower still lacks its second power route, check the cable ahead-right and the crawl opening. The left timed-door route leads to the first unit; the second uses the lift and right-hand pillars, with the same crawl opening for the return.
Climb the tower’s wooden stairs. Use the code from your clue, then press the red control inside to open the onward gate. Collect the camera from the table opposite the button.
03What should happenReveal the solution
The route beyond the tower opens.
Still stuck?
Check your active objective and your own clue. Published code examples disagree; that does not establish randomization.
Follow the fossil walls and crane route. When Bronto attacks, stay on the tunnel escape path and squeeze through the narrow opening.
03What should happenReveal the solution
You reach the next worksite traversal.
Still stuck?
Keep the next marked escape route or narrow passage in view before leaving cover. Follow this encounter’s objective; do not transfer the Allo stare rule to other creatures.
Read Today’s Door Code on the monitors. Climb the cavern to the far control and press its red button; take the working keypad beside the partly opened door. Fit it to the broken panel, enter your displayed code and slide through.
03What should happenReveal the solution
The repaired door lets you continue.
Still stuck?
Knowing the monitor code does not repair the broken panel. If it still cannot be used, check that you collected the working keypad beside the partly opened door after pressing the far red control; if the repaired panel rejects a code, compare your own Today’s Door Code screen rather than a published example.
You have crossed the repaired door and raised beams.
02What to doA nudge in the right direction
Reach the three sub-switches around the cavern: climb the right ladder and ledges to the first, cross the upper route to the next, and reach the third on the left.
03What should happenReveal the solution
The next Bronto encounter can progress.
Still stuck?
Check this first group against its three raised routes: right ladder and ledges, onward upper crossing, then the left-hand switch. If those are complete but Stella now asks for emergency shutoffs, you have moved to a different three-control task; the earlier switches do not make the later water crossing safe.
Bronto is hunting and Stella has requested emergency shutoffs.
02What to doA nudge in the right direction
Follow the edge routes and cables to all three red-lit emergency controls. Operate all three before attempting the electrified-water crossing, then continue along the escape route.
03What should happenReveal the solution
The water route becomes passable.
Still stuck?
If the water is still electrified, check the three red-lit emergency controls around its edge, following their cables. Do not count the earlier raised sub-switches as these shutoffs; complete this group before using the water crossing, rather than testing it by jumping in.
Escape through the narrow passage and climb the rocks on the left. Press the red button and use the left ledges to beat the auxiliary door’s timer. Follow the long upward climb to the lift and finish Stella’s call.
03What should happenReveal the solution
The lift-side access code is available.
Still stuck?
Plan the route before activating the control. If the timed opening or goo retracts, return to its button and trigger it again.
The shutoff escape route and Stella’s next call are complete.
02What to doA nudge in the right direction
Use the side-door code in your objective. Descend using ledges and yellow bars; inspect the workshop platform and its bench by the red toolbox for the lift fuse before going past it.
03What should happenReveal the solution
You have the fuse needed for the lower lift controls.
Still stuck?
Separate access from the fuse pickup: the side-door code comes after Stella’s call, while the loose fuse is a later shaft check. If you reached the lower controls without it, recheck the workshop bench beside the red toolbox; source descriptions differ, so no exact floor number is confirmed here.
Install the fuse at the lower landing and finish the timing sequence. Follow the stairs and ladder to the lift controls; operate the wheel to continue.
03What should happenReveal the solution
The route beyond the shaft lift opens.
Still stuck?
If the fuse is still in your inventory, the lower power box is not yet confirmed repaired: fit it and finish the timing sequence. If that repair is complete but you are waiting beside the pickup bench, follow the stairs and ladder to the separate wheel controls.
You have left the shaft and reached the stopped conveyor.
02What to doA nudge in the right direction
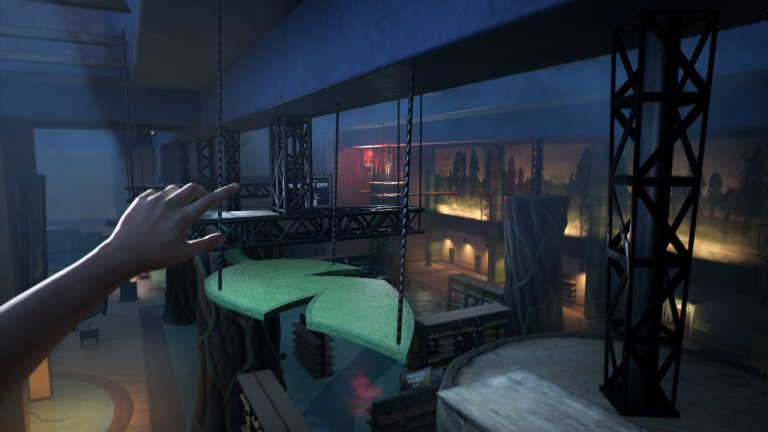
Enter the machinery office and use the red control. Move through its timed opening, then follow the hanging platforms and rock route toward the gondola.
03What should happenReveal the solution
The red suspended gondola is reachable from above.
Still stuck?
Plan the route before activating the control. If the timed opening or goo retracts, return to its button and trigger it again.
Use crates, wooden platforms, bars and rock ledges to enter the red gondola. Take its key; after the cutscene pick it up again, then leave by the marked rock route.
03What should happenReveal the solution
You can unlock the chain-link gate.
Still stuck?
Recollect the key after the cutscene. Empty geometry after the chase is a reported loading fault; check your installed version and official notes. Community reload fixes are unverified.
Unlock the chain-link gate and follow the Bronto escape to the boarded obstruction. Find the fenced Dynamite Locker, finish Stella’s call, use your keypad clue and take the workbench charge.
03What should happenReveal the solution
You have the first blasting charge.
Still stuck?
Check your active objective and your own clue. Published code examples disagree; that does not establish randomization.
Return along the cave ledges to the boarded obstruction. Hold the interaction at the marked receptacle to plant the charge, then follow the red wire to the separate plunger and detonate it.
03What should happenReveal the solution
The blasted passage leads toward the final arena.
Still stuck?
Picking up dynamite is not a detonation. Finish planting at the marked receptacle, then use the separate plunger.
The first blasted passage leads into a further Bronto chase.
02What to doA nudge in the right direction
In the large-structure arena, collect and plant four charges while avoiding Bronto. Three are around the outer hall or tunnels; the fourth is behind the structure under lights. Follow red wires to planting points; use the detonator at the fourth-charge location.
03What should happenReveal the solution
The collapse and water sequence ends Chapter Two.
Still stuck?
Picking up dynamite is not a detonation. Finish planting at the marked receptacle, then use the separate plunger.
Start both side generators before returning to the tower. The left route uses timed doors and platforms; the forward-right cable leads through a crawlspace to the second generator. Back at the tower, use your clue to enter and press the red gate control. One generator alone is insufficient.
How do I replace the broken worksite keypad?
Read Today’s Door Code on the monitors. Climb to the far red control, press it, and collect the working keypad beside the partly opened door. Install it on the broken panel and enter the code displayed in your game. Knowing a code does not replace the missing panel.
Do the three upper switches also make the electrified water safe?
They are separate tasks. First activate the three upper sub-switches around the cavern to progress the encounter. Later, follow the edge routes and cables to three red-lit emergency shutoffs. Operate all three shutoffs before attempting the water crossing; completing the earlier switch set is not enough.
Where is the fuse for the lift shaft, and what comes after fitting it?
During the shaft descent, inspect the workshop platform and the bench beside the red toolbox before passing it. Take that fuse to the lower landing and complete the fusebox timing sequence. Then follow the stairs and ladder back to the lift controls and operate the wheel.
I picked up the gondola key. Why is the chain-link gate still locked?
The route specifically requires picking up the key again after the gondola cutscene. Check your inventory, recollect it, leave by the marked rock route and use it at the chain-link gate. The initial pickup before the scene does not complete that sequence.
How do I detonate the first charge at the boarded passage?
After opening the chain-link gate, reach the fenced Dynamite Locker, finish Stella’s call and use your keypad clue. Take the workbench charge back to the boarded obstruction. Hold the interaction to plant it at the marked receptacle, then follow the red wire to the separate plunger.
Where are the four charges in the Chapter Two finale?
Three charges are around the outer hall or tunnels of the large-structure arena; the fourth is behind the structure under lights. Collect and plant all four while avoiding Bronto, following the red wires to the planting points. Use the detonator at the fourth-charge location to trigger the collapse sequence.