Free guide tools, with no account required. Terrible Lizards walkthrough: Follow 54 sourced objectives across four chapters, with prerequisites, next actions and checks when a step fails.
Free guide tools · $0No accountJSON backupsSaved in this browser
The companion tools are free; the game is a separate purchase.
JSON restores progress · CSV is for spreadsheets. JSON import: max 1,000,000 bytes.
Chapter 1Not started
Open reception
01
Before you start
Start at the broken-down car.
02What to doA nudge in the right direction
Use the roadside payphone and enter the museum. Collect code-note halves from the Allosaurus hand and Brontosaurus base; open reception with your completed clue.
03What should happenReveal the solution
The employee route opens.
Still stuck?
Check your active objective and your own clue. Published code examples disagree; that does not establish randomization.
Take the theater token from the box office and insert it into the theater token machine. Enter and let the presentation begin.
03What should happenReveal the solution
The opening presentation starts.
Still stuck?
Check the item’s inventory label and the door or machine you are using. This step needs the earlier pickup; reaching the location alone is insufficient.
Take the staff door beside the stage; climb the crates and cage to the projection room. Fit the table fuse, get three green indicators, and press the projector button. Return and finish the film.
03What should happenReveal the solution
The Time Tunnel exit opens.
Still stuck?
If the fusebox shows three green indicators but the Time Tunnel is closed, check the projector’s red button and whether the restarted film has finished. If a timing press fails, wait for the marker’s next pass rather than treating the fuse pickup as a completed repair.
Reach the Watering Hole control room and finish Stella’s call.
02What to doA nudge in the right direction
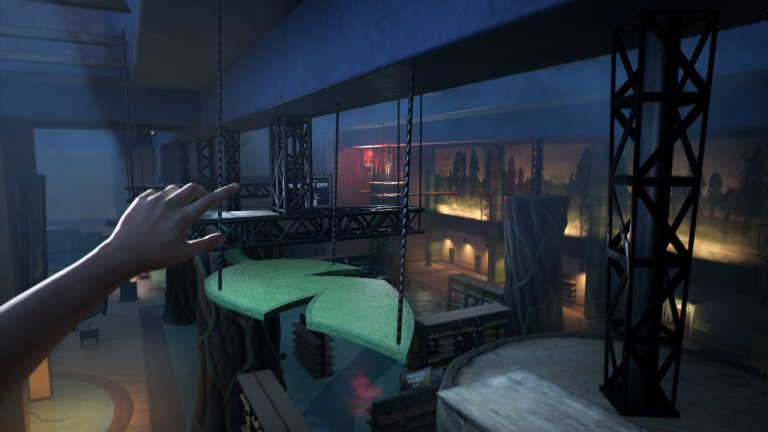
Activate all three upper switches: climb the dinosaur and ladder on the right; use the balcony, branches and bars; reach the raised display beside the control room. Return to the main lever and pull it.
03What should happenReveal the solution
The exhibit gate opens.
Still stuck?
A raised switch is only one part of the gate circuit. Check the dinosaur-and-ladder route, the balcony-and-branches route and the display beside the control room; after all three, return to the room’s main lever. If you have only reached the room, finish Stella’s call before following those routes.
Cross above the electrified floor using ledges, pipes and yellow holds. Take the token from the raised open box and exchange it at the purple Dilo Dash counter.
03What should happenReveal the solution
You have a light for the dark attraction.
Still stuck?
Identify the next marked ledge or bar before jumping. Movement prompts vary by input device; this guide has not tested every platform.
Ride the moving dinosaur display to the opposite platform. Take the button beside the open case on the crates; return by the lower route. Fit and press it, then pass the opening into the service route, laboratory and shops.
03What should happenReveal the solution
The gift-shop route is accessible.
Still stuck?
Plan the route before activating the control. If the timed opening or goo retracts, return to its button and trigger it again.
The basement door is accessible after Stella’s call.
02What to doA nudge in the right direction
Collect all three basement fuses. Repair the pillar fuseboxes by the office, toy shop and arcade, completing each timing sequence. Move away from the pursuing mascot before returning to a panel.
03What should happenReveal the solution
Three repaired fuseboxes await their upper connections.
Still stuck?
Match each basement fuse to the office-side, toy-side and arcade-side pillar boxes, then check which timing repair is still unfinished. If all three boxes are repaired but the lights remain off, the next check is the three upper connections, not another basement fuse search.
Use the arcade’s upper vent to reach the rafters. Cross the beams and bars and plug in all three connections above the pillars. Return through the vent to the office and finish Stella’s call.
03What should happenReveal the solution
The floor-level floodlight controls are ready.
Still stuck?
Lower fusebox repairs and upper plugs are separate checks: trace all three pillar tops from the arcade vent route. If the three plugs are connected, return through that vent to the office and finish Stella’s call before testing the floor-level floodlight controls.
Head left from the hub and cross the crates. Trigger the first timed door, follow the generator cable to the next button, and cross its timed platform route. Start the generator; use the return-route button to reach the hub.
03What should happenReveal the solution
The first side generator is running.
Still stuck?
First check whether you have actually started the generator beyond the left-hand timed-door route. If a door closed while you were crossing, return to its own button and line up the route before reopening it; reaching the hub again does not confirm that the generator was started.
The first generator is running and you are back at the hub.
02What to doA nudge in the right direction
Follow the cable ahead and to the right through the crawlspace. Use the lift, cross the right-hand platforms and pillars, and start the second generator. Crawl through the same opening to return.
03What should happenReveal the solution
Both tower power routes are restored.
Still stuck?
If the first generator is running but the tower still lacks its second power route, check the cable ahead-right and the crawl opening. The left timed-door route leads to the first unit; the second uses the lift and right-hand pillars, with the same crawl opening for the return.
Climb the tower’s wooden stairs. Use the code from your clue, then press the red control inside to open the onward gate. Collect the camera from the table opposite the button.
03What should happenReveal the solution
The route beyond the tower opens.
Still stuck?
Check your active objective and your own clue. Published code examples disagree; that does not establish randomization.
Follow the fossil walls and crane route. When Bronto attacks, stay on the tunnel escape path and squeeze through the narrow opening.
03What should happenReveal the solution
You reach the next worksite traversal.
Still stuck?
Keep the next marked escape route or narrow passage in view before leaving cover. Follow this encounter’s objective; do not transfer the Allo stare rule to other creatures.
Read Today’s Door Code on the monitors. Climb the cavern to the far control and press its red button; take the working keypad beside the partly opened door. Fit it to the broken panel, enter your displayed code and slide through.
03What should happenReveal the solution
The repaired door lets you continue.
Still stuck?
Knowing the monitor code does not repair the broken panel. If it still cannot be used, check that you collected the working keypad beside the partly opened door after pressing the far red control; if the repaired panel rejects a code, compare your own Today’s Door Code screen rather than a published example.
You have crossed the repaired door and raised beams.
02What to doA nudge in the right direction
Reach the three sub-switches around the cavern: climb the right ladder and ledges to the first, cross the upper route to the next, and reach the third on the left.
03What should happenReveal the solution
The next Bronto encounter can progress.
Still stuck?
Check this first group against its three raised routes: right ladder and ledges, onward upper crossing, then the left-hand switch. If those are complete but Stella now asks for emergency shutoffs, you have moved to a different three-control task; the earlier switches do not make the later water crossing safe.
Bronto is hunting and Stella has requested emergency shutoffs.
02What to doA nudge in the right direction
Follow the edge routes and cables to all three red-lit emergency controls. Operate all three before attempting the electrified-water crossing, then continue along the escape route.
03What should happenReveal the solution
The water route becomes passable.
Still stuck?
If the water is still electrified, check the three red-lit emergency controls around its edge, following their cables. Do not count the earlier raised sub-switches as these shutoffs; complete this group before using the water crossing, rather than testing it by jumping in.
Escape through the narrow passage and climb the rocks on the left. Press the red button and use the left ledges to beat the auxiliary door’s timer. Follow the long upward climb to the lift and finish Stella’s call.
03What should happenReveal the solution
The lift-side access code is available.
Still stuck?
Plan the route before activating the control. If the timed opening or goo retracts, return to its button and trigger it again.
The shutoff escape route and Stella’s next call are complete.
02What to doA nudge in the right direction
Use the side-door code in your objective. Descend using ledges and yellow bars; inspect the workshop platform and its bench by the red toolbox for the lift fuse before going past it.
03What should happenReveal the solution
You have the fuse needed for the lower lift controls.
Still stuck?
Separate access from the fuse pickup: the side-door code comes after Stella’s call, while the loose fuse is a later shaft check. If you reached the lower controls without it, recheck the workshop bench beside the red toolbox; source descriptions differ, so no exact floor number is confirmed here.
Install the fuse at the lower landing and finish the timing sequence. Follow the stairs and ladder to the lift controls; operate the wheel to continue.
03What should happenReveal the solution
The route beyond the shaft lift opens.
Still stuck?
If the fuse is still in your inventory, the lower power box is not yet confirmed repaired: fit it and finish the timing sequence. If that repair is complete but you are waiting beside the pickup bench, follow the stairs and ladder to the separate wheel controls.
You have left the shaft and reached the stopped conveyor.
02What to doA nudge in the right direction
Enter the machinery office and use the red control. Move through its timed opening, then follow the hanging platforms and rock route toward the gondola.
03What should happenReveal the solution
The red suspended gondola is reachable from above.
Still stuck?
Plan the route before activating the control. If the timed opening or goo retracts, return to its button and trigger it again.
Use crates, wooden platforms, bars and rock ledges to enter the red gondola. Take its key; after the cutscene pick it up again, then leave by the marked rock route.
03What should happenReveal the solution
You can unlock the chain-link gate.
Still stuck?
Recollect the key after the cutscene. Empty geometry after the chase is a reported loading fault; check your installed version and official notes. Community reload fixes are unverified.
Unlock the chain-link gate and follow the Bronto escape to the boarded obstruction. Find the fenced Dynamite Locker, finish Stella’s call, use your keypad clue and take the workbench charge.
03What should happenReveal the solution
You have the first blasting charge.
Still stuck?
Check your active objective and your own clue. Published code examples disagree; that does not establish randomization.
Return along the cave ledges to the boarded obstruction. Hold the interaction at the marked receptacle to plant the charge, then follow the red wire to the separate plunger and detonate it.
03What should happenReveal the solution
The blasted passage leads toward the final arena.
Still stuck?
Picking up dynamite is not a detonation. Finish planting at the marked receptacle, then use the separate plunger.
The first blasted passage leads into a further Bronto chase.
02What to doA nudge in the right direction
In the large-structure arena, collect and plant four charges while avoiding Bronto. Three are around the outer hall or tunnels; the fourth is behind the structure under lights. Follow red wires to planting points; use the detonator at the fourth-charge location.
03What should happenReveal the solution
The collapse and water sequence ends Chapter Two.
Still stuck?
Picking up dynamite is not a detonation. Finish planting at the marked receptacle, then use the separate plunger.
You have washed into the next digsite and spoken to Stella.
02What to doA nudge in the right direction
Climb past the tower and machinery. Run and jump from yellow bounce goo toward the upper landing. Later, press the red button to expose the timed goo and bounce before it retracts.
03What should happenReveal the solution
You reach the larger train worksite.
Still stuck?
Plan the route before activating the control. If the timed opening or goo retracts, return to its button and trigger it again.
The train console and raised control room lack power.
02What to doA nudge in the right direction
Pull the exterior lever beside the control-room door. Return inside and press the red button to break open the locker below; take its dynamite.
03What should happenReveal the solution
You can blast the blocked metal doorway.
Still stuck?
If the control-room red button is unpowered, recheck the exterior lever beside that room’s door. If the locker below has opened but the metal doorway is still blocked, collect the charge and move to the separate planting-and-detonation step; pressing the locker button again is not that blast.
Plant it at the blocked metal doorway and use the plunger. Start the generator beyond the blast, return to the train controls and activate the powered machinery. Follow the raised route and tunnels.
03What should happenReveal the solution
The route reaches the first Allosaurus hunting area.
Still stuck?
Picking up dynamite is not a detonation. Finish planting at the marked receptacle, then use the separate plunger.
Face the Allo to pause it briefly, then move toward the next rock slit or turn. Use the escape markings and gaps too narrow for its body; move on before the stare makes it angry.
03What should happenReveal the solution
You can reach the water escape.
Still stuck?
Keep the next marked escape route or narrow passage in view before leaving cover. Follow this encounter’s objective; do not transfer the Allo stare rule to other creatures.
Run and jump onto a goo-covered panel. Jump off toward the next ledge or hanging bar, then link the panels along the marked route to the freight buildings.
03What should happenReveal the solution
The freight-office and track area is accessible.
Still stuck?
Identify the next marked ledge or bar before jumping. Movement prompts vary by input device; this guide has not tested every platform.
Search the freight offices for the key and use it at the locked work gate. Continue into the power route beyond it.
03What should happenReveal the solution
The freight generator route is open.
Still stuck?
Check the item’s inventory label and the door or machine you are using. This step needs the earlier pickup; reaching the location alone is insufficient.
The main freight control has no power and the work gate is open.
02What to doA nudge in the right direction
Use the side goo wall and ladder route to the power area. Repair the fusebox just inside the gate, then follow the stairs and cable to start the yellow generator.
03What should happenReveal the solution
The hanging-platform controls have power.
Still stuck?
Check each required connection and finish the current call or interaction. If the expected event still fails, compare your installed build with the official patch notes.
Press the upper red button and cross via the goo wall, hanging bar, panels and red frame. At the lower scaffold press the next red button to bring the second platform, then cross toward the timber shaft.
03What should happenReveal the solution
The tall shaft traversal is reachable.
Still stuck?
Plan the route before activating the control. If the timed opening or goo retracts, return to its button and trigger it again.
Climb the timber shaft using ladders, yellow ledges and supports. When Allo interrupts the lift, follow the cave escape; pass Dalton’s belongings and continue to the large rail cavern.
03What should happenReveal the solution
You reach the four-fuse hunting area.
Still stuck?
Keep the next marked escape route or narrow passage in view before leaving cover. Follow this encounter’s objective; do not transfer the Allo stare rule to other creatures.
The rail cavern needs four fuses and generator power.
02What to doA nudge in the right direction
Follow the colored cables to the fenced yellow generator. Take the fuse from the lit green workbench and start the generator.
03What should happenReveal the solution
One fuse is collected and the cavern has generator power.
Still stuck?
The lit green workbench pickup and the yellow generator start are two different actions. If you collected this fuse but the cavern still lacks power, recheck the generator itself; if power is restored but you are short of fuses, compare the low office, upper office and locked shed instead of assuming this pickup supplied all four.
Enter the low office with broad windows facing the cavern and collect its fuse. Use the narrow rock gap outside to get clear of the pursuing Allo.
03What should happenReveal the solution
The low-office fuse is collected.
Still stuck?
Use the building’s position to distinguish this pickup: it is the low office with wide windows facing the cavern, not the wooden office on the upper loop. If Allo prevents a clear check, use the narrow rock gap outside to get clear before revisiting the office; finding a different fuse does not confirm this one.
The locked ground-level shed needs its key from above.
02What to doA nudge in the right direction
Climb near the Call It In sign; cross bars and goo panels to the key cabinet and take Shed. Continue over the upper platforms to the small wooden office with desk and video equipment; take its fuse.
03What should happenReveal the solution
You have the Shed key and upper-office fuse.
Still stuck?
Check the two pickups separately: the elevated cabinet supplies the key marked Shed, while the small wooden office farther along the upper route supplies a fuse. If you have Shed but are still missing a fuse, recheck the office with desk and video equipment rather than counting the key as that fuse.
Return to ground level and follow the tracks to the wooden shed with the keys-above notice. Unlock it and take the fuse from the lit workbench.
03What should happenReveal the solution
The shed’s fuse is collected.
Still stuck?
If the ground-level shed is still locked, check for the actual Shed key from the upper cabinet, not just completion of the upper climb. If the door is open but this fuse is unconfirmed, check the lit workbench inside the trackside shed with the keys-above notice; the upper-office fuse is a different pickup.
The generator is running and you have all four replacement fuses.
02What to doA nudge in the right direction
Fit all four into the single central panel beside the bright floodlights. Check that all indicators are green, then use the large control console to open the route.
03What should happenReveal the solution
The Motherlode route opens.
Still stuck?
Check all four green indicators and generator power first. Official patch 1.0.9 lists a second-Allo-hunt fuse fix; it does not prove an existing save is repaired.
Follow the Motherlode climb and outpost route. Climb the tower exterior to its control room and use the red console to open the descent into the blue caves.
03What should happenReveal the solution
Chapter Four begins in the organic caves.
Still stuck?
Check each required connection and finish the current call or interaction. If the expected event still fails, compare your installed build with the official patch notes.
Escape the opening blue-cave chase to the abandoned camp.
02What to doA nudge in the right direction
Follow the glowing surfaces and timber route to the counterweight. Press its red button to release the weight; bounce up the exposed goo route to the scaffolding and upper passage.
03What should happenReveal the solution
The upper route toward DJ is open.
Still stuck?
Check each required connection and finish the current call or interaction. If the expected event still fails, compare your installed build with the official patch notes.
You have passed the counterweight and an unusable gun.
02What to doA nudge in the right direction
Follow the crying voice to DJ and hear his request. Cross the pit on hanging bars, take the side passage and collect the Allo tooth in the small room. Continue up the stairs to the projection room.
03What should happenReveal the solution
You have DJ’s tooth before the next encounter.
Still stuck?
Hearing DJ’s request does not confirm that you picked up the tooth. If it is missing, check the small room reached by the hanging bars across the pit and its side passage; if you already have it, the stairs lead onward to the projection-room encounter, not another tooth pickup.
The presentation has ended with a creature breaking the screen.
02What to doA nudge in the right direction
Try the weapon on the nearby crates, then the next beside the green-lit stack. Both fail. When Jordan abandons the gun, leave through the open cave and continue until the return-to-DJ objective appears.
03What should happenReveal the solution
The scripted encounter ends; DJ is your next objective.
Still stuck?
The failed guns belong to this scripted sequence. Follow the next pickup and exit objective rather than waiting for a weapon to become usable.
You have the tooth and the objective has sent you back to DJ.
02What to doA nudge in the right direction
Return to DJ with the tooth. After the dialogue, follow the new attack route through blue tunnels, yellow bars, goo walls and timber ledges to the crew-lift camp.
03What should happenReveal the solution
DJ waits at the covered lift controls.
Still stuck?
First compare the active objective: the return-to-DJ prompt follows the failed-gun encounter and the open-cave escape. Once that prompt appears and the tooth is collected, return for the dialogue; the next attack leads toward the crew-lift camp, so do not wait at the gun pickups for them to become usable.
Speak to DJ, then take the sloping path outside to the switch on a wooden post. Turn on the camp lights and return to DJ and the projection area for the lift-key objective.
03What should happenReveal the solution
You are directed to recover the crew-lift key.
Still stuck?
If DJ is at the covered desk but the lift-key objective has not appeared, check the conversation and the camp-light switch on the wooden post along the outside slope. After the lights are on, return to DJ and the projection area; merely reaching the locked lift is not that objective’s completion.
The key is in Cavern B, whose entrance is blocked.
02What to doA nudge in the right direction
Enter Cavern A. Follow its ramps, goo walls, bars and platforms to the dynamite worktable. Bring the charge back to B, plant it at the obstruction and use its plunger.
03What should happenReveal the solution
Cavern B is open.
Still stuck?
Picking up dynamite is not a detonation. Finish planting at the marked receptacle, then use the separate plunger.
Use bounce goo, wallrunning panels and hanging bars to reach the high ridge. Take the key beside the body and final note before dropping toward the exit.
03What should happenReveal the solution
You have the key required at the crew-lift controls.
Still stuck?
Identify the next marked ledge or bar before jumping. Movement prompts vary by input device; this guide has not tested every platform.
Follow the marked chase route and wallruns until the cliff encounter ends. Continue past the tents to the next explosive obstruction; plant at its marked receptacle and detonate to reopen the camp route.
03What should happenReveal the solution
The return path to the crew-lift camp is open.
Still stuck?
The published route describes this return blast but does not locate a separate charge pickup. Check your active objective and inventory; no extra locker location is verified here.
You have returned to the crew-lift camp with its key.
02What to doA nudge in the right direction
Insert and turn the key at the covered desk, then operate the lever. Go downstairs beneath the Crew Lift sign, board with DJ and press the inside start button.
03What should happenReveal the solution
The lift starts its ascent.
Still stuck?
If the lift is idle, separate the desk controls from the onboard start: check that the recovered key was inserted and turned and the lever operated. Then go below the Crew Lift sign and board with DJ to use the inside button; stopping at the desk omits the final start action.
The creature has forced Jordan off the rising lift.
02What to doA nudge in the right direction
Follow side-wall goo, yellow bars and ledges upward. Cross the higher panels and red suspended structure, pass the cramped cave and smaller creatures, then run toward DJ’s call and jump back onto the lift.
03What should happenReveal the solution
The final lift struggle plays out.
Still stuck?
Identify the next marked ledge or bar before jumping. Movement prompts vary by input device; this guide has not tested every platform.
Choose the chapter matching your run, then select the last checkpoint whose result you can see in the game. A saved link may select a specific checkpoint instead of the one you last read. Selecting a checkpoint and marking it complete are separate actions; Next moves the reading guide, not the game.
Separate a missed prerequisite from a failed event
If the expected door, light or route has not changed, revisit that checkpoint’s prerequisite before repeating later actions. Correct an accidental completion mark without resetting every chapter. If the prerequisite and action both match, compare the linked source and relevant patch information; the website cannot diagnose your save or promise a bug fix.
Keep reading records separate from game progress
Export CSV for a spreadsheet view of recorded steps. Keep JSON when you need to restore the manual tool state elsewhere; CSV is not an import format. JSON imports are limited to 1,000,000 bytes. Optional collection marks and plush attempts remain separate, so correcting a route record does not certify or undo anything in your game.
How much of the story does this walkthrough cover?
The guide organizes four chapters into 54 researched checkpoints: 11, 16, 16 and 11. Each checkpoint covers an actionable story task. Optional collectibles have their own tracker and are not automatically treated as requirements for story progression.
What should I check when an objective does not work?
Start with the prerequisite, reveal the next action, then compare the expected result with your game. Use the troubleshooting section if the result differs. A checked website objective only records your decision; it cannot trigger the game’s mechanism.
Will my current objective survive a language change?
The current objective uses the same stable identifier in every language. Within the same site address and browser, switching language or refreshing retains that selection and completed steps. Export a JSON backup before moving to a different browser or address.
Can I use a code without collecting its clue?
Follow the clue and keypad hint shown in your own run. Published routes can record a particular playthrough’s code, but that is not a guarantee for every version or platform. Collect required clue pieces before relying on the completed hint.
Are these routes tested on every current platform?
No. The steps summarize linked walkthroughs and relevant official patch information; they are not first-hand gameplay tests. Platform, save and version differences remain possible. Compare an affected step with its source and the behavior in your own game.
Where is the separate dynamite pickup for the Chapter 4 return blast?
The researched route describes the later placement and detonation but does not establish a separate pickup location. That gap remains explicit. The guide does not invent a supply point or promise that the earlier charge is automatically replenished.